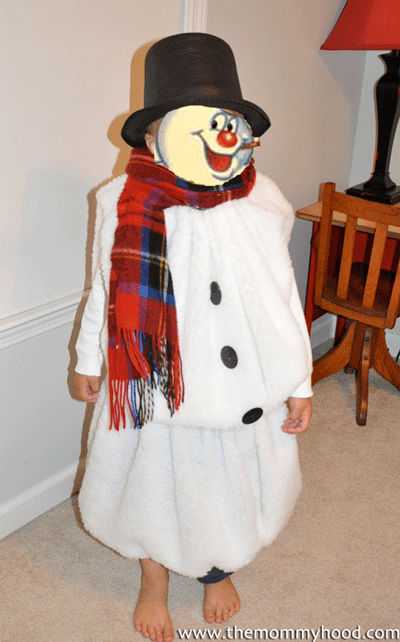
The following is a tutorial on how to make a low-cost snowman costume with very little sewing.
Frosty the Snowman
 I didn’t do this for the picture, but I plan to stuff his
little belly to round him out on Halloween. Right now he looks
a little like Frosty the beer drinker.
Here’s what you will need:
- 1.25 yards of Sherpa (or other white and fuzzy) fabric $6
- 1 package of 3/4” elastic $2
- 3 black buttons $3
- Black thread
- Needle
- Scissors
Note: this is what I used for a 4-year-old’s costume, so adjust quantities according to the age/size of your snowman.
Instructions
- Cut elastic into three strips. One for around the waist, one for around the neck and one for around the legs.
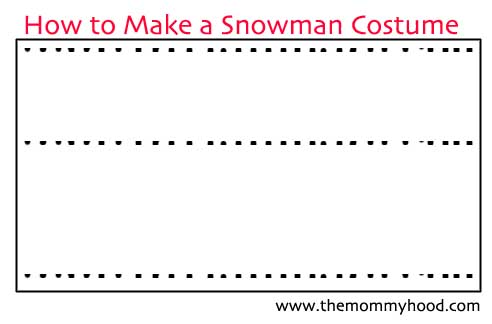
- Open up the fabric on a flat surface and make cuts as shown on the diagram. Tip: I used a yard stick to measure and draw a straight line for the middle row of fabric cuts.
-
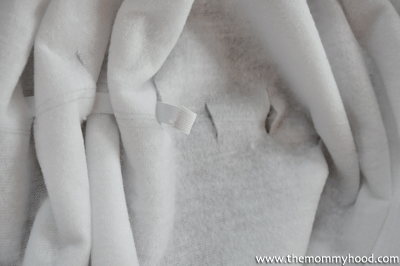
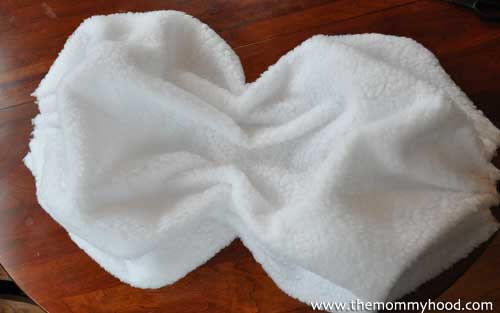
 Next, feed the elastic through each strip of cut marks horizontally in an over-under sewing pattern and tie the ends together when finished. Repeat this for the other horizontal cut marks.
 -

 Sew black buttons on the upper part of the snowman body.
 - Put the costume on your child (have them step in carefully) and adjust the fabric around them. (The fabric will technically be open in the back, but there’s so much fabric, you can’t tell).
- Next, find the best place for the armholes and cut them. Feeling around I asked my son where his shoulder was and he replied, “It’s right by my neck,” which made me laugh. And that’s it, folks!
My son will wear this over a white turtleneck with a red scarf and a black top hat. It only took a few minutes to make (well, after the madness). It’s decent, and the cost was only about $12!
Glad this costume is done and I didn’t wait until the 11th hour to start it, which is what I usually do. Anyone else guilty of that?


Cute!!
Thanks, Amy!
Brilliant! Thank you for sharing, I have a 6yo who is a snowman in this year’s Christmas show, you have saved my bacon ! (and possibly made me very popular with the parents of other snowmen as I can whip these up in a flash!)
That’s fantastic, Emma! Glad to be of help. Merry (early) Christmas!
Nice looking costume. Quick question, how wide was the fabric you used? I assume the elastic is going across the grain? I’m likely to make a pair of these as my daughter and I need snowmen costumes on short order.
Hmmmmm. You know I am not certain. It was probably 45 inches (folded in half). So I am guessing 90 inches wide. I opened it up and worked from there. I didn’t cut the edges of the fabric at all. You can always eyeball it to make sure it’s enough. Wrap yourself (or your lil snowman to be) to see if it’s enough to cover with some extra.
Good luck, Dan! Would love to know how they turn out.
Heather
being on a budget I went straight to the closeout fabric section. No shaggy looking stuff in white so I ended up with just a plain white poly blend. Then I ended up stitching in some fabric, sewed on some felt buttons and folded once across the grain (think poncho), cut out a neck hole and arm holes, hemmed those and then serged the sides together. It ended up deviating a good bit from your costume but it worked with the materials I had. Then for mine (yes, 11th hour totally…) I took two sections of the full width fabric and serged them together along the grain so I ended up with some really wide (like 100″ wide) fabric. Again, flip over, thinking poncho, made sleeves but left everything from the underarm down really wide. Bias tape around the neck line elastic cord through the bottom hem. Then I used some scraps and threw together some hospital scrub like pants (worn over normal pants). Finally, since the shirt part (which also had black felt buttons) was so huge we stuffed me with about 35 baloons. I was a big and wide snowman!
Well, it ended up deviating quite a bit from yours but your post was my inspiration for it! Thanks again for posting it.
Hey! Congratulations on a successful costume! I bet the balloon stuffing worked great! Way to go, Dan! Happy Christmas to you and your little snowgirl!
I’m trying to make an Olaf costume for a recital and this was extremely helpful!!! U r so clever. What did u end up stuffing it with…just like odds and ends?
Just made this for my son who was insistent on dressing as a snowman…so easy! Can’t wait till he gets home from school to try it on!!
Sorry for the delayed response! Thanks for your note. So so glad it worked out. Hope he loved it!
Thank you for this easy inexpensive awesome idea!!! I used a Sherpa blanket from the dollar store!!! I was able to run the elastic through the top and bottom seam of the blanket and only had to cut the center lines by hand! This was so easy and turned out so good! Wish I could send you a pic! Thanks a bunch!!!!!